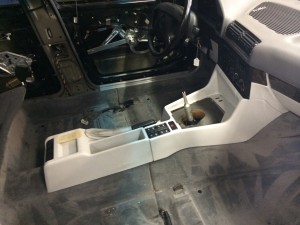
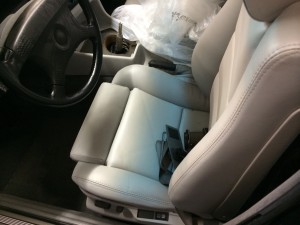
BMW E34’s have a fairly simple interior. The E34 M5 complicates things a little bit by introducing unique seats and a shift surround. Still, despite unique M5 components, restoring the seats, door panel leather, and shift boot leather is a straight forward process. The only real problem was the shift surround. If your E34 M5 shift surround trotted away with a band of scoundrels, get ready to scour eBay and BMW forums. While you are at it, get ready for disappointment.
Our first step in the interior restoration was to completely remove all interior components minus the dashboard. This is a fairly straight forward process and something you want to complete before attempting body work. The only part that always makes me cringe is snapping loose the door panels as the majority of the clips on older models like this will break. Don’t worry, they are cheap and readily available.
After removal, the entire interior was sent to an interior restoration specialist who replaced cracked leather and re-colored all leather to its original Light Silvergrey (code 0438 / 0527).
Though the majority of the interior restoration was straight forward, there were two elements that presented an issue. The first was the stolen shift surround. The E34 M5 had a unique shift surround that featured coin holders on both sides of the stick shift. These are NLA and finding a used one is next to impossible. There are a few out there working on 3D prints of this part but nothing has surfaced for purchase in 2014. I have to pat myself on the back for being patient here but as this car came near completion, I had to do something. I settled upon a standard E34 shift surround. Instead of going with Light Silvergrey, however, I went with a combo of a black surround, black shift boot, and black shift knob. Eventually I will find an original or remade M5 shift surround and this decision will be easy to upgrade. For now the black accent is fun.
The second challenge was properly deodorizing the interior as it smelled old. I knew exactly what to use–Zorbex a medical
grade neutralizer I’ve had great results with in the past. And, I wanted to use Zorbex while the interior was out, however, introducing chemicals prior to paint is a bad idea as it can effect the paint process. Still, you don’t want to re-install the interior after painting as you risk scratching the paint. What I settled on doing was waiting until after the paint process was complete but we left the seats unbolted so they could be moved in the interior of the car.
The final touch for the interior was replacing the floor mats. Light Silvergrey E34’s ship with a charcoal grey carpet. Since OEM mats were NLA, I decided to get black Bavarian Autosport custom mats with a custom stitched “M5” done in black as well. This is a subtle touch that doesn’t take away from the original interior but does add a bit of spice for the eye that is soaking in the details.
The last detail was a headliner replacement which is standard work for any interior shop.
Interior restorations have always scared me as I can never get past the damage and vision the end product. In this case I had to follow the process and have faith in a great result. That is exactly the way this worked out.

